

Fixing Leaky Bathroom Fixtures
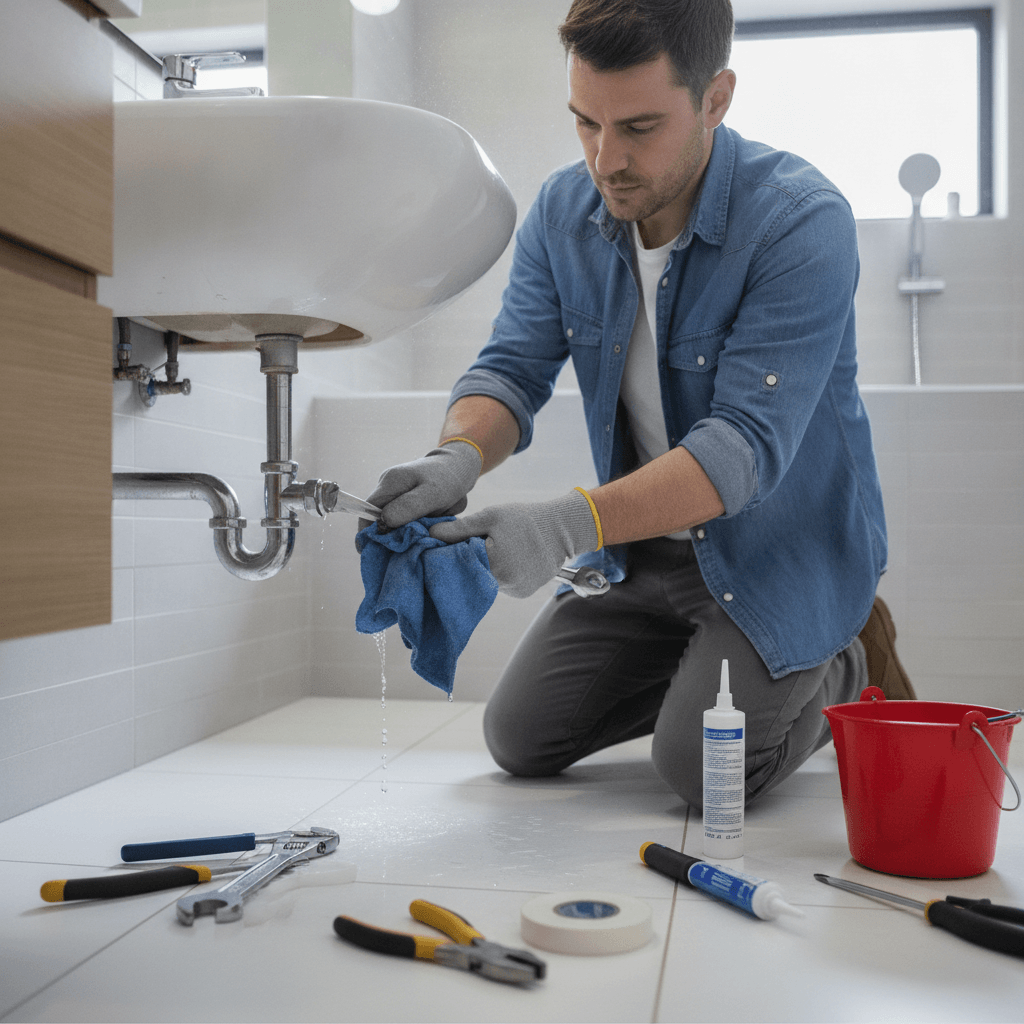
A leaky bathroom fixture can be a real nuisance. I have seen countless homes where a small drip turned into a much bigger problem. It is more than just an annoying sound, it is also a waste of water and money. Over time even a slow leak can lead to significant water damage, mold growth, and higher utility bills.
Addressing these leaks quickly is important. Many common bathroom fixture leaks are simple to fix with the right tools and a bit of know-how. This guide offers practical advice and step-by-step instructions to help you tackle those drips and keep your bathroom running smoothly.
We believe in empowering homeowners with the information they need for a well maintained home. Just as we advocate for a healthy body we also encourage a healthy living space.
Common Causes of Leaky Bathroom Fixtures
Understanding why your bathroom fixtures leak is the first step toward fixing them. I have noticed most leaks stem from a few key issues that are usually easy to identify. These problems often worsen if left unattended, leading to more extensive damage over time.
One very common culprit is a worn-out washer or gasket. These small rubber or silicone components create a watertight seal inside your faucets and showerheads. With constant use and exposure to water they degrade, becoming brittle or compressed. This causes the seal to break down and water to escape.
Another frequent cause is mineral buildup. Hard water leaves behind deposits of calcium and magnesium inside pipes and fixtures. This accumulation can erode parts, obstruct the proper seating of seals or even corrode metal components. Such corrosion can eat away at the metal itself creating tiny holes that allow water to seep through.
Sometimes the issue is much simpler like loose connections. Over time the constant water pressure and daily use can cause nuts and bolts holding your fixtures together to loosen. This creates small gaps where water can escape. Damaged O-rings or seals, particularly in the base of a faucet or around the showerhead connection, also lead to leaks. Lastly hidden cracks in the fixture itself or in the connected pipes are more serious problems. These often require professional attention but sometimes a small hairline crack can be overlooked until a leak becomes obvious.
Essential Tools and Supplies for DIY Fixes
When I approach a leaky fixture I always make sure to have the right tools on hand. This prevents multiple trips to the hardware store and keeps the repair process efficient. Having everything ready saves time and makes the job less frustrating.
For most common leaks a basic toolkit is enough. I usually start with an adjustable wrench or a set of pliers. These help loosen or tighten connections. A screwdriver set with both flathead and Phillips head options is also very useful for removing screws on faucet handles or escutcheons. You will also want a utility knife or a small flathead screwdriver for prying open decorative caps or trim pieces.
Beyond the basic tools I recommend having some specific supplies. A roll of plumber’s tape also known as PTFE tape is invaluable for creating a tighter seal on threaded connections. Replacement washers and O-rings are essential since these are often the primary cause of leaks. Keep an assortment of common sizes or purchase a repair kit for your specific fixture type. A small bucket or towel is a good idea to catch any residual water when you disassemble the fixture. Lastly safety gloves protect your hands. Safety glasses shield your eyes from debris or splashes. Having these items ready ensures a smoother repair experience.
Step-by-Step Guide to Fixing a Leaky Faucet
Fixing a leaky faucet is a common home repair I often guide people through. The process can seem daunting but breaking it down makes it quite manageable. Before you start always turn off the water supply to the faucet. Look under the sink for the shut-off valves or turn off the main water supply to your home. Then open the faucet to drain any water left in the lines.
Diagnosing Faucet Leaks
I always begin by trying to figure out where the leak comes from. Is water dripping from the spout, or is it leaking around the base of the handle? The location of the leak helps determine which internal parts need attention. A drip from the spout often means a worn-out washer or cartridge inside. Leaks from the base of the handle suggest problems with the O-rings or packing nuts.
Repairing Compression Faucets
Compression faucets are older styles with separate hot and cold handles. To fix a leak I remove the decorative cap on the handle and unscrew the handle screw. Then I pull off the handle. You will see a packing nut underneath. I use a wrench to loosen it and remove the stem. At the bottom of the stem is a rubber washer. This is usually the culprit. I replace it with a new one making sure it is the correct size. Then I reassemble the faucet in reverse order applying plumber’s tape to any threaded connections for a better seal.
Tackling Cartridge Faucets
Cartridge faucets are newer and often have a single handle that controls both temperature and flow. To fix these I usually remove the decorative cap and screw holding the handle. After removing the handle I might see a retaining clip or nut. I carefully remove that and pull out the old cartridge. I take the old cartridge to the store to find an exact match. Then I insert the new cartridge making sure it aligns properly. I replace the retaining clip or nut, then the handle, and finally turn the water back on slowly to check for leaks. This method usually resolves most cartridge faucet drips.
Addressing Leaky Showerheads and Toilets
Leaks in showerheads and toilets are also very common. They are often overlooked because the water goes directly down the drain or into the bowl. However these leaks can still waste a lot of water and drive up your bills. Addressing them promptly is a good idea.
Fixing a Dripping Showerhead
A dripping showerhead usually means a problem with the washers or O-rings inside the mixing valve or the showerhead itself. First I make sure the water is completely off at the main supply. Then I carefully remove the showerhead from its arm by unscrewing it counter-clockwise. Sometimes it might be stiff so I use a wrench with a cloth to prevent scratching. I clean any mineral deposits from the showerhead and the arm connection using a vinegar solution. I check the rubber washer inside the showerhead. If it looks worn I replace it. For leaks coming from the connection to the wall I wrap plumber’s tape around the threaded end of the shower arm before screwing the showerhead back on tightly. If the drip continues the problem could be inside the wall behind the handle or knob which might mean a worn cartridge or valve needing replacement. This is a bit more complex but often follows a similar pattern to faucet repairs.
Stopping a Running Toilet
A running toilet is one of the most wasteful leaks. It often happens when water continuously flows from the tank into the bowl even when not flushing. I always start by lifting the tank lid and observing the mechanisms. The most common causes are a faulty flapper valve or an incorrectly adjusted float. If the flapper valve, which is the rubber seal at the bottom of the tank, does not close properly, water escapes. I check for any visible wear or debris under it. Replacing a flapper is usually a straightforward process. I just unhook the old one and attach a new one. If the water level is too high, causing water to constantly spill into the overflow tube, I adjust the float arm. Lowering the float arm or adjusting the float mechanism reduces the water level in the tank. This stops the continuous flow. After making any adjustments I flush the toilet a few times to ensure the fix is working correctly and the tank refills and stops properly.
When to Call a Professional Plumber
While I encourage homeowners to try simple DIY fixes, there are definite times when calling a professional plumber is the smartest choice. Some problems are simply beyond the scope of a basic toolkit or average homeowner experience. Attempting complex repairs without the right expertise can make a small leak into a major disaster. This can cause more damage and lead to much more expensive repairs later on.
If you encounter persistent leaks that return even after you have tried to fix them, it is a clear sign to seek expert help. Leaks that involve the main water line, or those located within walls or ceilings, are also best left to professionals. These hidden leaks can cause extensive structural damage if not handled correctly. Any repairs that involve soldering pipes or working with gas lines definitely require a licensed and experienced plumber. They have the specialized tools, knowledge, and insurance to handle these jobs safely and effectively.
Similarly if you are dealing with low water pressure, a complete lack of hot water, or multiple fixture issues throughout your home, these could indicate a larger plumbing system problem. A professional plumber can diagnose these underlying issues accurately. Finding a good plumber is like finding other reliable home service professionals. For instance, if you need someone to check your cooling system you might want to see the full breakdown on finding ac repair services to ensure you get a qualified technician. The same principles apply to choosing a plumbing expert. They bring peace of mind and ensure the job is done right. Sometimes saving money means knowing when to stop and call for help.
Preventing Future Leaks and Maintaining Fixtures
Proactive maintenance is key to avoiding future leaky bathroom fixtures. I always emphasize that a little attention now can save a lot of trouble and expense later. It is much easier to prevent a problem than to fix one. Establishing a routine for checking your fixtures can catch minor issues before they become serious.
One simple step is regular inspection. Take a few minutes each month to visually check all your faucets, showerheads, and toilets. Look for any signs of corrosion, discoloration around connections, or tiny drips. Feel around the bases of fixtures and under the sink for any moisture. Even a slight dampness can indicate a developing leak. I also pay attention to how my fixtures feel. If a faucet handle becomes stiff or too loose, it could signal internal wear that needs addressing.
Another important aspect is gentle handling of your fixtures. Avoid overtightening faucet handles as this can wear out washers and O-rings more quickly. Teach children to turn off faucets gently. Regular cleaning helps a lot too. Mineral buildup from hard water is a major cause of leaks and damage. Use mild cleaning solutions and soft brushes to keep fixtures free of scale and grime. For showerheads I recommend soaking them in a vinegar solution periodically to dissolve mineral deposits that can clog the spray holes and stress the internal components. Lastly monitoring your home’s water pressure is useful. Very high water pressure can put unnecessary strain on plumbing connections and fixtures. Consider installing a pressure regulator if your home consistently experiences high water pressure. This small investment can significantly extend the life of your plumbing system and fixtures.
Final Thoughts on Keeping Your Bathroom Dry and Functional
Keeping your bathroom fixtures in good working order helps maintain a comfortable and efficient home. I know how quickly a small drip can escalate into a larger concern causing frustration and unnecessary expense. Taking proactive steps to identify and fix minor leaks can prevent significant water damage and conserve precious resources. It is all about being attentive to the subtle signs your plumbing gives you.
Remember that many common leaks are straightforward for a handy homeowner to tackle. With a basic understanding of your fixtures and a few essential tools you can often resolve these issues yourself. This empowers you and saves you money on service calls. However I cannot stress enough the importance of knowing when to seek professional help. Complex issues or persistent problems demand the expertise of a licensed plumber. They ensure the job is completed safely and correctly protecting your home and investment.
Embrace a routine of regular inspections and gentle maintenance for all your bathroom fixtures. This simple habit will extend their lifespan and keep your home’s plumbing system functioning optimally. A dry and functional bathroom contributes to the overall well-being and value of your home. Do not let those drips persist. Take action today to ensure your bathroom remains a place of comfort and efficiency.
 Transforming Homes to Support Senior Living
  Your Statistics Tutor
  The Dormo-Diagnostics Sleep Machine
  Vacation Travel Club
  What is Search Engine Optimization
  Poverty Lines
  Fixing Leaky Bathroom Fixtures